
Water damage leaves more behind than soaked floors and dripping walls. It leaves behind conditions where mold can settle quietly and grow quickly. Homes in busy cities like New York face this risk even more because moisture lingers indoors longer, and small leaks often go unnoticed. This guide brings together practical, reliable steps to create a mold-safe home after any kind of water incident. It also helps you understand when professional help matters most, especially for families looking for strong mold prevention after flood events and those searching for a dependable water damage mold checklist that NYC residents can follow year after year.
A Fresh Start: Understanding Why Mold Forms So Quickly
Water damage creates the perfect environment for mold to thrive. All it needs is moisture, warmth and something to feed on, such as drywall, wood frames, insulation, or furniture. Mold can begin growing within twenty-four to forty-eight hours after water exposure. That is why quick action becomes essential.
Even when surfaces seem dry on the outside, hidden dampness behind walls and under flooring keeps feeding mold spores. Many homeowners feel surprised to learn that a room can look fine yet still hold high humidity that encourages new mold growth. A good checklist helps prevent those hidden conditions from turning into bigger problems weeks later.
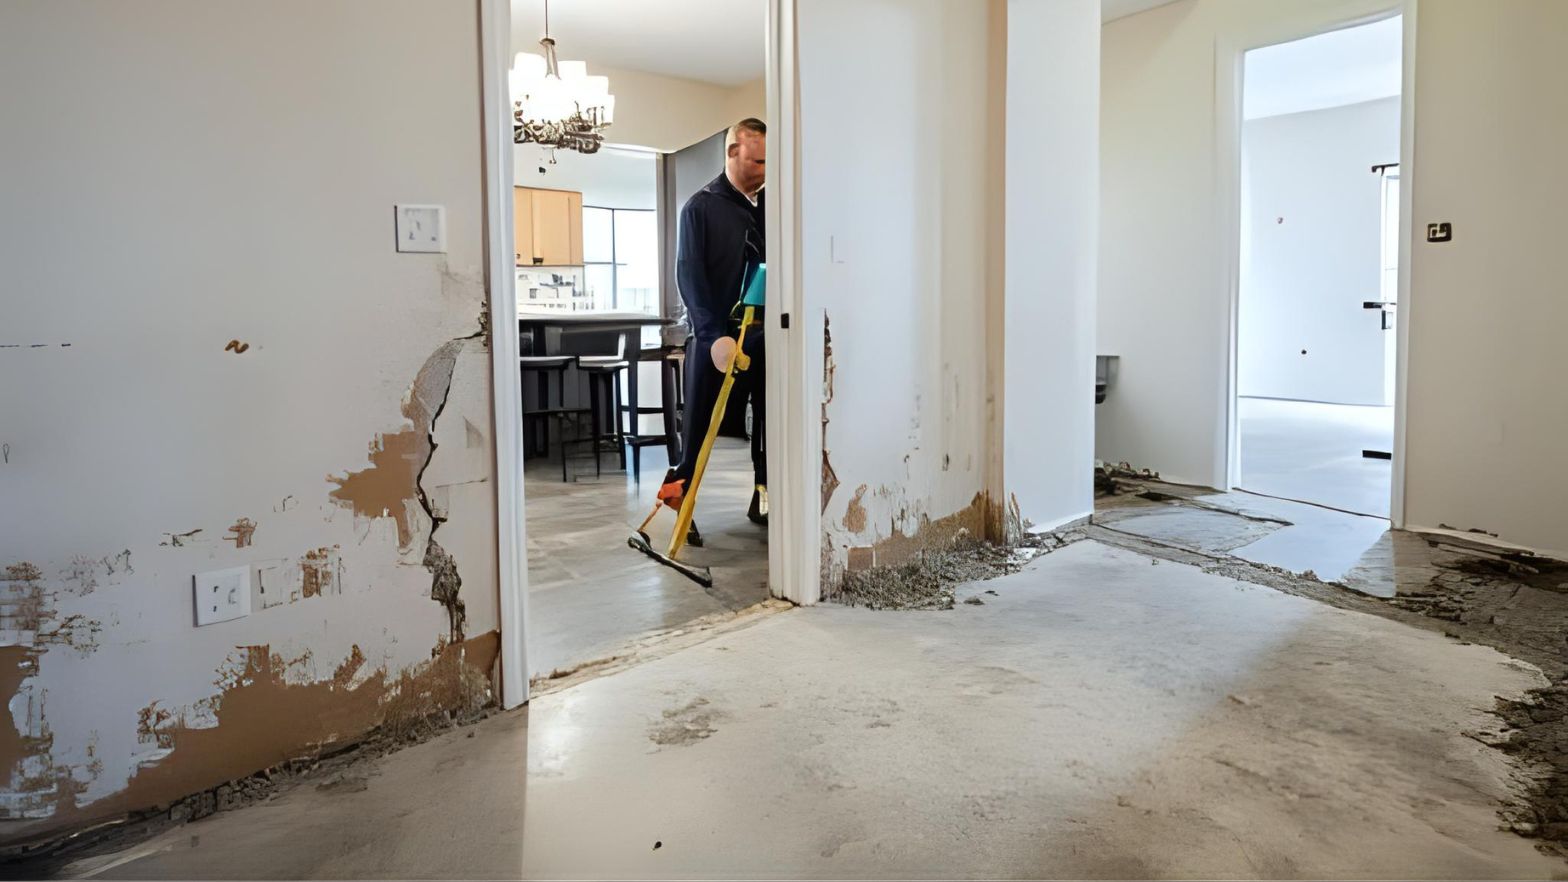
Step One: Remove Standing Water Thoroughly
Any leftover water speeds up mold activity. Start by removing standing water from floors, carpets, basements, and crawl spaces. Wet vacuums, pumps, and absorbent towels help, but thoroughness matters more than speed. Move furniture and appliances so water does not stay hidden beneath them.
If the flooding is widespread or has soaked parts of the home that are hard to reach, calling professionals ensures the job is handled with strong equipment and complete extraction. This is one of the most important parts of mold prevention after flood damage because early oversights cause long-term issues.
Step Two: Dry the Space Completely
Once the water is gone, the drying stage begins. Fans, open windows, and dehumidifiers work together to remove moisture from the air and surfaces. Keep the air circulating until humidity levels drop to normal. You may need several days of active drying, especially in humid neighborhoods or older buildings where airflow is limited.
Never rely on warm air alone. Warmth without ventilation keeps moisture trapped and encourages mold. Dehumidifiers are valuable tools, but they must run consistently and be emptied properly. If the smell of dampness lingers, the area needs more drying time.
Step Three: Inspect All Water-Touched Materials
Water affects everything it touches. Soft materials like carpets, drywall, insulation, and upholstery hold moisture deep inside. Even when the top layer feels dry, the core may still be damp.
Check each material carefully. Carpets may need to be lifted. Drywall needs to be pressed lightly to feel for softness. Wood surfaces may swell slightly. Baseboards may look warped. Each sign tells you whether the material can be restored or should be replaced.
Step Four: Clean and Sanitize Every Affected Surface
Cleaning helps remove dirt, bacteria, and small mold spores that may have settled right after the water exposure. Use detergent and water to scrub surfaces. Hard surfaces clean easily, but porous ones often need special attention.
Sanitizing adds another layer of protection. Many homeowners use the wrong products or dilute them too much, which weakens their ability to prevent mold. Professionals use stronger, safer antimicrobial solutions that reach deeper into materials and help slow mold growth even in areas where moisture hides.
Step Five: Improve Airflow and Reduce Indoor Humidity
Moisture in the air plays a major role in mold growth. High humidity allows surfaces to stay damp longer. Make airflow part of your daily routine for several days or weeks after water damage.
Open windows when the weather allows. Run fans during the day. Keep interior doors open to allow air to pass freely. Dehumidifiers should stay on until humidity drops consistently below sixty percent.
Many homeowners add this simple step to their water damage mold checklists because city apartments often have less natural ventilation.
Step Six: Keep an Eye on Hidden Areas
Some areas stay damp more than others. Check basements, closets, attics, crawl spaces, and corners where the air does not circulate well. These spots collect humidity and grow mold quietly.
Look for signs such as a musty smell, discoloration on walls, peeling paint, or unusual patches on surfaces. The earlier you notice these changes, the sooner you can address them.
If you smell something odd but cannot see the source, professionals can use moisture meters and thermal imaging tools to locate hidden dampness.
Step Seven: Address Leaks and Structural Issues Quickly
A slow leak becomes a long-term mold problem. Pipes behind walls, roofs, windows, and old plumbing fixtures may drip without being obvious. After any water event, check all these areas for weakness.
Roof shingles, window seals, basement walls, and bathroom tiles often need attention. Even a tiny crack allows water to creep into wall cavities. Fixing these issues protects the home from future mold growth and adds strength to your mold prevention plan.
Step Eight: Replace What Cannot Be Saved
Some materials cannot be fully dried or sanitized. For these items, replacement becomes the safest choice. Wet insulation, soaked drywall, deeply saturated carpets, and heavily damaged belongings create ongoing risk if kept.
Removing them feels difficult, but it prevents mold and protects the rest of the home. If you are unsure what can stay or what must go, professional mold specialists give accurate evaluations based on moisture levels and material condition.
Step Nine: Schedule a Professional Mold Inspection
Even when everything looks clean, mold can hide where you least expect it. A professional mold inspection adds confidence and peace of mind. Experts use advanced tools to detect moisture that stays invisible to the eye.
This step plays a strong role in mold prevention after flood events because homes often have hidden moisture pockets that show up only under professional testing. A certified mold inspector checks each room, measures humidity, evaluates materials, and confirms whether the home is safe.
Step Ten: Keep a Long-Term Maintenance Plan
Moisture management becomes a habit after any water incident. Keep this checklist handy for future reference. Review attic ventilation, weatherproofing, indoor humidity, and plumbing health regularly. A simple seasonal inspection helps catch small problems early.
A Mold-Safe Home Starts with the Right Steps
Mold grows quickly but can be prevented with careful, steady action. This checklist helps homeowners follow a reliable path toward a healthier living space. Still, some situations call for professional help, especially those involving storm damage, burst pipes, or long-standing moisture.
If you want the safest results and a truly mold-protected home, connect with experts who know how to inspect, treat, and restore with precision.
For dependable support and thorough mold remediation, call Apex Mold Specialists today. Your home deserves the strongest protection.


Comments are closed.